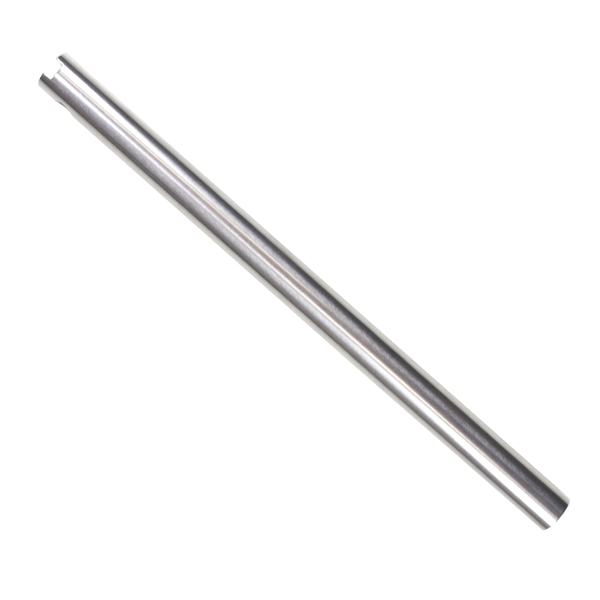
The correct Knight muzzleloader breech plug removal tool is usually the breech plug wrench end of a model-compatible Knight combo tool. The exact tool depends on your rifle model and breech plug design. Always verify that the muzzleloader is completely unloaded and unprimed before beginning any maintenance.
Across the United States, muzzleloader owners often clean their rifles after a hunting trip, a day at the range, or a long period in storage. A Knight muzzleloader has a removable breech plug on many models, but that does not mean every wrench will fit every plug. choosing the right tool helps prevent damage to the plug, receiver, and surrounding parts.
Knight Rifles has produced several rifle designs and breech plug styles over the years. The owner’s manual for your exact model is the best starting point for identifying the correct wrench and learning which parts must come out first. A tool that looks close to the right size may still fail to engage the plug properly.
This guide explains what the Knight muzzleloader breech plug removal tool does, how to identify the correct type, what to check before buying one, and how to respond when a plug will not turn. It also covers common fit errors, basic care, and situations where a qualified gunsmith should handle the work. It does not replace the manual for your specific rifle.
Source: muzzleloaders.com
What Is a Knight Muzzleloader Breech Plug Removal Tool?
A Knight muzzleloader breech plug removal tool is a wrench designed to engage the breech plug so it can be removed for approved cleaning and maintenance. The breech plug closes the rear of the barrel and forms part of the rifle’s ignition system. Its design varies with the rifle model and ignition arrangement.
On many Knight rifles, the required wrench is built into a combo tool. A combo tool may also have a screwdriver or other features for routine maintenance. The correct end must match the plug and engage it fully. A loose fit can round off the working surfaces and make later removal harder.
The term breech plug removal tool can also refer to a dedicated wrench sold separately. Some products are made for other muzzleloader brands or for a particular plug design. A listing that says universal does not, by itself, prove that the tool fits your Knight rifle.
The most useful buying detail is compatibility, not the number of functions packed into the tool. Check the model name, plug style, and instructions in the owner’s manual before ordering a replacement.
Source: muzzleloaders.com
Knight combo tool
A multi-purpose tool with a breech plug wrench end on compatible rifle models. Confirm the correct version before use.
Dedicated breech plug wrench
A tool intended mainly for engaging and removing a particular breech plug design. Its fit must be checked against the exact rifle.
Cleaning tools
Brushes, picks, and cleaning rods may help with approved cleaning tasks, but they are not substitutes for the correct removal wrench.
What Does the Breech Plug Do?
The breech plug sits at the rear of the barrel and helps contain the pressure produced when a muzzleloader fires. Its threads and seating surfaces must remain in proper condition. A plug that is damaged, incorrectly fitted, or not installed as the manufacturer directs can create a serious hazard.
Removing the plug provides access for cleaning on models designed for that service. The procedure is not identical across all Knight rifles. Some models require other parts to be removed first, so do not assume that a method shown for one model applies to another.
Know the exact design
Use the model-specific manual to identify the plug, wrench end, and required disassembly steps.
How to Identify the Correct Knight Breech Plug Tool
The safest way to identify the right tool is to match it to the rifle, not to guess from a photo. Knight has made different rifles and plug designs, and older models may have different parts from newer ones. Even two rifles of the same caliber may not use identical breech plugs.
Find the full model name first. It may appear on the barrel, receiver, purchase paperwork, or original owner’s manual. If the markings are worn or unclear, compare the rifle with official model documentation or ask a qualified gunsmith who works on muzzleloaders.
Next, find the breech plug section in the manual. Look for the part illustration, the named tool, and any instructions about removing the bolt, trigger assembly, or other components. Do not take the presence of a wrench in a product photo as proof that it matches your rifle.
When buying online, check the actual part number and the seller’s fit information. If the listing gives only a caliber or a broad phrase such as Knight style, ask the seller to confirm compatibility. A clear answer about the exact model is more useful than a general promise of fit.
Source: amazon.co.uk
Rifle model
Record the full model name and any model revision or production details available from the manual.
Breech plug design
Compare the plug shape and tool interface with the official parts illustration.
Tool part number
Use the manufacturer’s documented part number when one is available.
Return policy
Check whether an incorrectly supplied tool can be returned before removing it from its packaging.
Why Caliber Alone Is Not Enough
Caliber describes the bore size, but it does not fully describe the breech plug or the wrench interface. A tool advertised for a .50-caliber muzzleloader may fit one design and fail to fit another. That is why a listing based only on caliber is not enough to confirm compatibility.
The same caution applies to older Knight rifles and replacement plugs. A previous owner may have replaced a part, or a rifle may use a plug that differs from the one shown in a general product photograph. Verify the installed part rather than relying only on the rifle’s age or caliber.
Best practice
Match the model, installed plug, and manufacturer’s tool specification before attempting removal.
What If the Original Tool Is Missing?
Start with the official Knight owner’s manual and current manufacturer support information. Knight manuals are available through the Knight Rifles information pages hosted by muzzleloaders.com. The correct manual may identify the combo tool and explain the required disassembly order.
If the exact tool is no longer sold, ask the manufacturer or a qualified gunsmith for a verified replacement option. Do not assume a modern wrench fits an older rifle just because both products carry the Knight name.
Avoid improvised substitutes
Pliers, adjustable wrenches, and poorly fitting sockets can damage parts and may slip under load.
Safety Checks Before Breech Plug Maintenance
Before any disassembly, confirm that the muzzleloader is completely unloaded and unprimed. Never rely only on the safety switch, a previous cleaning session, or someone else’s statement that the rifle is empty. Follow the unloading and verification instructions in the manual for your exact model.
If you cannot confirm the rifle’s condition, stop. Do not begin removing the plug or attempt to solve the problem by pulling parts apart. Have a qualified gunsmith or other appropriately trained professional inspect it.
Choose a clear, well-lit work area away from children, pets, ammunition, powder containers, and open flames. Keep the muzzle pointed in a safe direction throughout handling. Wear eye protection when carrying out manufacturer-approved cleaning and maintenance.
Black powder and approved muzzleloading propellants can leave residues that need proper handling. Keep powders away from heat and ignition sources, and follow the product label for storage and cleanup. Do not use compressed air or an unapproved chemical method to blow residues into the work area.
Keep the manual nearby. A rifle may need a particular sequence of disassembly before the breech plug becomes accessible. Removing parts in the wrong order can damage the firearm or create an unsafe condition.
Source: muzzleloaders.com
Verify unloaded status
Follow the manufacturer’s full unloading and inspection procedure. If there is any doubt, do not proceed.
Remove the ignition source as directed
Confirm that no primer or other ignition component remains installed, following the exact model instructions.
Protect the work area
Use a stable surface, suitable lighting, eye protection, and a way to keep small parts from rolling away.
Stop when something is unclear
Seek qualified help rather than guessing about a component or safety step.
Do Not Treat a Safety Switch as Proof That the Rifle Is Empty
A safety mechanism helps prevent some forms of unintended firing, but it does not prove that the barrel contains no charge. A muzzleloader may remain loaded even when it has not been fired recently. Safe maintenance begins with the manufacturer’s unloading and verification procedure, not with the position of the safety switch.
If the condition is uncertain
Keep the muzzle pointed safely and contact a qualified professional who can assess the rifle without guesswork.
Using the Correct Tool for Routine Maintenance
Once the rifle has been verified unloaded and unprimed, follow the exact model manual for access to the breech plug. The manufacturer’s instructions determine which assemblies must be removed and which tool end is intended to engage the plug. There is no single disassembly sequence that safely covers every Knight rifle.
Inspect the tool before use. Its working surfaces should be clean and free of cracks, bends, or heavy wear. Inspect the accessible plug interface for visible damage or debris. If the tool does not seat correctly, stop rather than trying to make it fit with force.
Use the tool only as the manual directs. Knight manuals describe counterclockwise rotation for removing many of the covered breech plugs, but access and disassembly requirements vary by model. Do not transfer that direction or a specific procedure to a rifle whose manual has not been checked.
If the plug begins to move as intended, continue only in accordance with the manual. Keep the tool aligned with its engagement surfaces and avoid sudden force. If the plug binds, the tool slips, or the rifle shifts in its support, stop and reassess the situation.
After removal, inspect the plug and the accessible surrounding parts under good light. Look for obvious thread damage, corrosion, unusual deposits, or signs that a previous tool has rounded the engagement surfaces. A plug with damage that could affect its fit should be evaluated before the rifle is returned to use.
Source: muzzleloaders.com
Follow the model manual
Use its disassembly order and the named wrench or combo tool.
Check the tool fit
The wrench should engage the intended surfaces without rocking, slipping, or sitting at an angle.
Keep parts organized
Place removed parts in a clean tray and keep them in the order recommended by the manufacturer.
Stop at resistance or damage
Do not continue if the plug or wrench behaves abnormally.
How to Tell When the Tool Does Not Fit
A correct wrench should match the intended interface described in the manual. Warning signs include a tool that rocks from side to side, contacts only a small part of the plug, or slips when gentle hand pressure is applied. These signs may point to the wrong tool, a damaged plug, or debris that prevents proper engagement.
Do not try to solve a fit problem by grinding the tool, filing the plug, or forcing a socket into place. Altering the tool or firearm can hide the original problem and create more damage. Confirm the part identification or seek professional help.
Good fit
The tool matches the documented interface and remains seated during the approved procedure.
Poor fit
The tool slips, rocks, or visibly damages the edges. Stop and verify compatibility.
What to Do When a Knight Breech Plug Is Stuck
A stuck breech plug is a reason to slow down, not apply more force at once. Fouling, corrosion, old lubricant, damaged threads, or a poorly fitting wrench may make the plug difficult to remove. The cause cannot be identified with certainty from resistance alone.
Begin by checking the manual and the tool fit. Confirm that you have identified the correct plug and followed the required disassembly steps. If the tool slips or fails to engage fully, do not continue turning it.
Knight’s published guidance emphasizes applying suitable high-temperature synthetic breech plug grease to the threads during installation on applicable designs. This helps reduce the chance of the plug sticking later. Grease does not guarantee that a neglected or damaged plug will come out easily.
Do not heat the barrel or receiver with a torch, use a power tool, strike the wrench, or extend the handle with an improvised bar. These methods can damage the firearm or create an unsafe condition. Do not pour solvents into an assembled firearm unless the manufacturer expressly permits that method.
If the plug remains stuck after the approved basic checks, stop and consult a gunsmith familiar with Knight muzzleloaders. Tell the gunsmith the exact rifle model, any known replacement parts, the tool used, and what happened during the attempt. This information can help them assess the problem without further damage.
Source: amazon.co.uk
Wrong tool
Confirm the part number and compatibility before attempting further work.
Heavy fouling
Use only the cleaning method and products approved for the exact model and plug.
Possible corrosion
Have the plug and receiver assessed if corrosion affects the threads or seating surfaces.
Damaged engagement surfaces
Stop using the tool if it slips or rounds the plug edges.
Persistent resistance
Leave the plug in place and seek qualified service rather than escalating force.
Can You Use a Generic Breech Plug Wrench?
A generic wrench is suitable only if the manufacturer or a reliable compatibility specification confirms that it fits the exact plug. Similar appearance is not enough. A tool designed for a different brand or plug style may fail to engage the working surfaces fully.
Before buying a generic replacement, compare the tool’s documented fit with the rifle manual and installed plug. If the seller cannot confirm the fit, choose a verified replacement or ask a qualified gunsmith.
Check before purchase
Ask for exact model compatibility, the supported plug design, and the manufacturer’s part reference.
Cleaning and Caring for the Breech Plug
Clean a removed breech plug only by the method approved for its exact design. Knight rifles have used different plug and ignition arrangements, so a method suitable for one part may be wrong for another. Check whether the manual permits the cleaning product, brush, or other tool you plan to use.
Do not assume that every breech plug contains a removable vent liner or another part that can be unscrewed. Some designs use fixed components. Trying to remove a part that is not intended to come out can damage the plug and change how it functions.
Inspect accessible surfaces for corrosion, cracks, damaged threads, and heavy deposits. A visual check cannot prove that every part is safe, but it can reveal a reason to stop. Replace or professionally assess a damaged component according to the manufacturer’s instructions.
Before reinstalling the plug, check the manual for the correct lubricant and installation method. Knight documentation calls for high-temperature synthetic breech plug grease on the threads of applicable models. Follow the exact directions for the plug you have, and do not substitute ordinary household grease without approval.
The goal is a clean, correctly fitted component, not the tightest possible installation. Over-tightening can make future removal harder and may damage parts. Use the manufacturer’s installation instructions rather than guessing at a torque value.
Source: muzzleloaders.com
Use approved cleaning products
Match the cleaner and cleaning method to the plug material and design.
Inspect before reassembly
Look for visible damage and stop if the plug or threads appear compromised.
Use the specified thread lubricant
Follow the manual for the exact type and placement of lubricant.
Avoid excessive tightening
Install the plug as directed instead of adding force beyond the manufacturer’s instructions.
Why Thread Grease Matters
Heat and firing residue can contribute to a breech plug becoming difficult to remove. The specified high-temperature grease helps protect the threads and reduce sticking on models that require it. It is a maintenance aid, not a fix for damaged threads or an incorrectly fitted plug.
Use only the lubricant stated in the owner’s manual. Too little, the wrong product, or an incorrect installation method may cause problems later. When the manual and a generic product label differ, obtain model-specific guidance before proceeding.
Before storage
Complete the manufacturer’s cleaning, inspection, lubrication, and storage steps for the rifle.
Choosing a Replacement Tool: A Practical Comparison
The best replacement tool is the one confirmed to fit your exact Knight rifle and plug. Price, extra functions, and a universal label matter less than correct engagement and clear compatibility information. A basic tool that fits properly is more useful than a feature-rich tool that does not.
The table below compares the main options by their practical use. It is a general decision aid, not a claim that every item in a category fits every Knight model. Confirm the part number and supported models before purchase.
Source: amazon.co.uk
Original or verified Knight combo tool
Usually the most direct option when the exact version is confirmed in the owner’s manual.
Dedicated compatible wrench
May suit an owner who needs only the breech plug wrench function, provided fit is documented.
Generic multi-brand wrench
Consider it only when reliable specifications confirm compatibility with the installed plug.
Professional service
The safer option when the plug is stuck, damaged, or cannot be identified with confidence.
What to Check in a Product Listing
A useful product listing names the supported rifle models or plug types and gives a part number or clear compatibility details. Product photos can help with identification, but they cannot establish fit on their own. Check the seller’s return terms in case the tool does not match the documentation.
Be cautious with listings that use broad wording such as fits most muzzleloaders. Ask whether the tool supports the precise Knight model and breech plug style. If the answer is vague, continue looking rather than guessing.
Compatibility
The seller should identify the exact models or plug designs supported.
Condition
For a used tool, check for wear, cracks, bends, and rounded engagement surfaces.
Documentation
Look for a manufacturer part number or instructions that confirm the intended use.
Common Mistakes to Avoid
Most avoidable problems begin with a wrong assumption: that all plugs fit the same wrench, that a rifle is empty because it was stored, or that a stuck part only needs more force. Checking the manual and the tool fit before starting can prevent costly damage.
Another mistake is treating every cleaning product or lubricant as interchangeable. Muzzleloader designs differ, and the wrong chemical or procedure may harm a component. Follow the manual for the exact rifle and plug instead of relying on advice for a different brand.
Do not reinstall a plug with visibly damaged threads or a rounded interface. Do not guess at tightening force, either. If a part does not seat as the manufacturer describes, stop and get qualified assistance before returning the rifle to service.
Source: muzzleloaders.com
Assuming all Knight tools are the same
Different models and plug styles may require different tools or disassembly steps.
Using excessive force
Force can damage the wrench, plug, or receiver and make repair more difficult.
Ignoring a damaged plug
Visible damage deserves inspection before the firearm is used again.
Guessing about lubricant
Use the product and application method specified for the exact model.
Following instructions for another rifle
A video or guide for a different model may omit steps required by your firearm.
When a Gunsmith Is the Right Choice
Professional help is appropriate when the rifle’s loaded status is uncertain, the plug is seized, the tool repeatedly slips, or threads appear damaged. It is also the right choice when the installed plug does not match the manual or the rifle’s history is unclear.
A gunsmith who knows muzzleloaders can identify the installed components and assess whether the plug and receiver remain serviceable. Avoid further attempts while waiting for an inspection, and do not fire a rifle with questionable breech plug fit or damage.
Seek service
Stop if safe status, compatibility, part condition, or the correct procedure cannot be confirmed.
Frequently Asked Questions
Q
What tool removes a Knight muzzleloader breech plug?
Many Knight rifles use the breech plug wrench end of a compatible Knight combo tool. The correct version depends on the rifle and installed plug. Check the exact model’s owner’s manual before buying or using a wrench.
Q
Are Knight muzzleloader breech plug tools universal?
No. A tool may fit some Knight models without fitting all of them, and tools made for other brands may use different interfaces. Confirm compatibility by model and plug design rather than caliber or appearance alone.
Q
Which way does a Knight breech plug turn for removal?
Knight manuals describe counterclockwise removal for many covered models, but the correct access and disassembly procedure depends on the rifle. Verify the instructions for your exact model before attempting maintenance.
Q
Why is my Knight muzzleloader breech plug stuck?
Possible causes include fouling, corrosion, old or unsuitable lubricant, damaged threads, and an incorrect wrench. Resistance alone does not identify the cause. Stop if the tool slips or the plug will not move under the approved procedure, and seek qualified service rather than adding improvised leverage.
Q
Can I use a wrench made for another muzzleloader brand?
Only if the manufacturer or a reliable compatibility specification confirms that it fits your exact plug. A similar shape does not prove that the wrench will engage safely. When fit is uncertain, obtain a verified tool or ask a qualified gunsmith.
Q
Should I grease the breech plug before reinstalling it?
Knight documentation calls for high-temperature synthetic breech plug grease on the threads of applicable models. Follow the owner’s manual for the exact plug, including the approved lubricant and installation method. Do not guess at the product or tightening force.
Q
Can I remove a stuck breech plug with pliers or a power tool?
Do not use pliers, a power tool, heat, impacts, or improvised leverage to force a stuck plug. These methods may damage the firearm and create additional hazards. Stop and have a qualified gunsmith assess the rifle.
✦ Wrapping Up
Conclusion
The right Knight muzzleloader breech plug removal tool depends on your exact rifle and breech plug design. For many models, the intended tool is the breech plug wrench end of a compatible Knight combo tool. The owner’s manual remains the best source for confirming the part, identifying required disassembly steps, and checking the correct maintenance method.
Before starting, verify that the rifle is unloaded and unprimed. Inspect the tool for damage, confirm that it fits the plug, and stop if the plug binds or the wrench slips. Use only the cleaning products and thread lubricant approved for your model.
A stuck plug does not mean you need a bigger wrench. It means you need to check the fit and condition before proceeding. When the cause remains unclear, professional service is safer than forcing the part.
💡 Key Takeaway
Find your exact Knight rifle model and read its breech plug section before buying or using a removal tool. Confirm compatibility, verify the rifle is unloaded and unprimed, and contact a qualified gunsmith if the plug is stuck or damaged.